Sunday, March 8, 2026

I feel one of the biggest challenges of upper elementary state tests does not actually have anything to do with specific content. I mean, yes...it's important to have a solid base of the standards. However, I feel that testing "overwhelm" is our biggest culprit that robs students of confidence and stamina. With a few quick strategies in their toolbox, however, students will be able to conquer this challenge with ease!

Here are three practical strategies you can try with your students this week as testing season approaches.

1. Teach Students to Read the Question First 

Many students automatically start reading a long passage and get lost before they even know what they’re looking for. Try this quick routine: Have students circle the question first before reading. Ask them to underline key words like main idea, best evidence, cause, effect, or theme. Then have them read the passage with a purpose—looking specifically for information that answers the question. A simple practice activity: Give students a short passage and cover it. Let them read the questions first and predict what they should watch for when they uncover the passage. This builds intentional reading habits very quickly. 

2. The “Cross It Out” Strategy (Process of Elimination) 

Students often feel stuck when they see four answer choices. Teaching them that they don’t have to find the right answer immediately can lower a lot of pressure. Model this thinking aloud: Read all answer choices. Cross out any answer that is clearly wrong. Narrow it down to two choices. Go back to the passage or problem to confirm. A great mini-practice: Put a question on the board and have students vote for which answer they would eliminate first and explain why. This helps them practice reasoning, not just guessing. 

3. Teach a Simple Pacing Plan for Long Tests 

Long assessments can feel overwhelming if students think they have to finish everything perfectly in order. A helpful structure: First Pass: Answer questions you feel confident about. Mark & Skip: If something feels confusing, circle it and move on. Second Pass: Return to the circled questions with fresh eyes. One easy classroom practice: Use a 10-minute “mini test sprint.” Students work through several questions quickly, skipping tough ones and returning later. This helps them learn that movement through the test is part of good strategy. 

These small habits—reading questions first, eliminating answers, and pacing through a long test—can really empower students during state testing. When they feel like they have a plan, their confidence grows tremendously.

Here are a couple of resources designed to make the testing process easier for students!

         CLICK HERE                        CLICK HERE                       CLICK HERE


Thank you for taking the time to help your students by learning how to empower them with some pretty helpful strategies!

Good luck in your continuing testing preparation!
:) Jennifer

Sunday, March 1, 2026

As state testing season approaches, one of the most powerful (and often overlooked) skills we can sharpen is students’ ability to closely read the questions — not just the passages. On upper elementary ELA state tests, many incorrect answers don’t come from a lack of comprehension. They come from misreading task words like analyze, compare, infer, best supports, most likely, or missing small but critical details such as “Part A” vs. “Part B” or “Select two answers.” 

Research on assessment literacy consistently shows that students who understand question structure and academic vocabulary perform significantly better — even when reading ability is similar. Here are three practical, high-impact strategies you can use next week:  

1️⃣ The “Circle–Underline–Box” Routine (3 Minutes, Daily Practice) Before students answer a question, train them to: Circle key task words (analyze, explain, describe, summarize, infer). Underline exactly what they are being asked to find (character trait, theme, text evidence, main idea, etc.). Box constraints (two details, best answer, paragraph 3, Part B). Model this under a document camera using released-style questions. Think aloud: “The word best tells me more than one answer might seem right. I need the strongest evidence.” Have students practice with just 2–3 questions a day — no full test required. The goal is building automaticity with academic language.  

2️⃣ Build a “Testing Vocabulary Wall” (Interactive + Active Use) Instead of a static word wall, create a living testing vocabulary chart with: Word Student-friendly definition What the student must DO when they see that word A quick example For example: Infer → “Use clues + what I already know” → I must look for hints, not direct statements. Have students: Sort question stems by skill (theme, character change, text structure). Rewrite a question using synonyms (“Which detail best supports…” → “Which detail proves…”). Create mini-quiz questions for a partner using assigned vocabulary words. This repeated exposure builds cognitive flexibility and reduces anxiety when formal test language appears.

3️⃣ Error Analysis Fridays (Metacognition in Action) Once a week, project one question with common wrong-answer traps. Instead of asking “What’s the right answer?” ask: Why might someone choose B? What word in the question makes C incorrect? Which part of the question did we need to pay closer attention to? Have students annotate why distractors are wrong. This builds test-wise thinking and strengthens comprehension simultaneously. You’ll start hearing students say things like: “Ohhhh, it says MOST LIKELY, not ALWAYS.” That awareness is gold.  

Close reading of test questions is not test prep fluff — it’s executive functioning, vocabulary precision, and metacognitive reading all rolled into one. And the best part? These strategies strengthen everyday comprehension, not just test performance.

Check out some resources that are aligned to provide practice for these exact skills!

        CLICK!                                      CLICK!                          CLICK!


Thank you for joining me to improve your test prep with these proven strategies!
:) Jen   (JB Creations)

Friday, February 20, 2026

Last spring, one of my fourth graders stared at the writing prompt for what felt like forever. He finally whispered, “I don’t even know how to start.” 

 It wasn’t that he couldn’t write — he just didn’t feel confident about what the test wanted from him. And honestly? I see this every year in 3rd, 4th, and 5th grade classrooms. Writing isn’t usually the problem — clarity and structure are. 

Here are three extremely practical ways to build writing confidence before state testing: 
🎯 1. Teach students to analyze the prompt like detectives. Instead of saying “read the prompt carefully,” model exactly how to break it apart.   Have students: 
     -Underline key words (explain, compare, describe, support, two reasons) 
     -Circle vocabulary they need to understand 
     -Box how many parts the response requires 

Then practice restating the prompt out loud and in writing: “If the prompt asks ___, I need to ___.” This alone dramatically improves focus and completeness. • 

🎯2. Create one consistent essay organizer everyone uses. Confidence comes from familiarity. Design a simple organizer students use every time — something that includes: 
       -Introduction (restated prompt + main idea) 
       -Body Paragraph 1 (reason/evidence + explanation) 
       -Body Paragraph 2 (reason/evidence + explanation) 
       -Conclusion (wrap up + restate thinking) 

When students know exactly where their ideas go, they stop panicking and start writing. The goal is automatic structure — not reinventing the wheel for every prompt. 

🎯 3. Practice “power phrases” that pull writing together. Many students struggle with transitions and formal tone. Teach and practice specific phrases they can rely on: 
       -To begin with
       -Another important reason
       -There are many examples that show
       -For instance
       -In conclusion

Post them. Chant them. Practice inserting them into responses. The more automatic these phrases become, the more polished and organized their essays feel — especially under testing pressure. Writing confidence doesn’t come from more worksheets. It comes from clarity, structure, and repetition of strong habits.

Here are a few tried & true resources that have been helpful when learning to write essays effectively!  

              
         PROMPT PRACTICE!            WRITING BUNDLE!           BUILD AN ESSAY!

You’ve got this — and so do your students.

Talk soon,  

Jennifer

Sunday, September 8, 2024

“A bottle of red, a bottle of white…..” Okay, so it wasn’t exxxxaaaactly like Billy Joel’s Scenes from an Italian Restaurant song. But it was still one of those really magical days in my classroom! I always do a unit on genre at the beginning of the year. I love books and reading and have always enjoyed sharing that love with my students. But, I’ve got to admit that it’s gotten harder and harder to accomplish this. Over more recent years, I’ve sadly watched as my gently worn books get replaced by audio books and the other distractions in my young students’ lives greatly outweigh the pull of a good story. So, I decided to make reading fun again! I transformed my room into a “Book Genre Café” for an hour in the morning and then again in the afternoon. Tablecloths, soft music, and candle (electric) lit tables beckoned students to enter and wonder. Boxes of carefully selected books along with a book-rating menu greeted students at each table as their waiters (teachers, aides, even our school treasurer!) wondered from group to group, sharing some dramatic reading from the back covers of new genres.
The hour seemed to fly by. It was one of those special times when true engagement was occurring. Students were looking at books from unfamiliar genres with eager eyes, frantically writing down titles of those interesting-sounding books that they wanted to read on their “must read” bookmarks. As they moved from science fiction to fantasy to historical fiction, my students were immersed in sampling the best literature I could find. As the students went to recess, my teaching partner and I exchanged tired but genuine smiles as we quickly cleaned up our café. It had been a good day!

Sunday, January 21, 2024

TEXT STRUCTURE: The very title of this topic can make the most seasoned teacher cringe a little. I’m not sure what it is exactly about this topic that makes so many teachers-present company included-shudder just a little, but it does every year!

Maybe it has to do with the fact that it’s like 5 mini topics that the students have to be aware of in order to distinguish between them? Perhaps it has to do with the fact that it’s another one of those more “inferred” skills that is often hidden in complex text? Or maybe that there’s often more than one structure imbedded in a story? Nevertheless, it remains a pretty big standard in upper elementary that must be covered. 

In order to tackle this challenging topic, I decided to take all of my material and organize it into a 3 week period of time using the “I do, We do, You do” model of instruction. 

The "I do, We do, You do" instructional model is a teaching approach that follows a structured progression of learning activities. In the "I do" phase, the teacher demonstrates a new concept or skill, providing a clear example for students to observe. This is followed by the "We do" phase, where students participate in guided practice with the teacher, receiving support and feedback as they apply the newly introduced information. Finally, in the "You do" phase, students independently practice and apply the knowledge or skills they have acquired. This model aims to gradually shift responsibility from the teacher to the students, fostering a progressive and interactive learning experience.

Week 1: (I do) 
  1. I introduce the idea of text structure through a Khan Academy video. Link HERE
  2. I spend each day this week going over a specific structure focusing on key words, purpose, and  examples as a whole group. There are some great flip books available on TPT that provide great background information on each structure and can provide a great point of reference moving forward.

Week 2: (we do)

After students have a good grasp of each text structure, it’s time to start identifying them within actual texts. We accomplish this through repeated practice in the following ways: 

Week 3: (you do) 
  1. By this week, we want to assess, both informally and formally, how students are progressing. To get an individual measure on each student’s progress, we have them complete the following independently:  *Text Structure task cards (digital or paper/pencil)
  2. After looking at their scores, I continue to either extend their learning through following:             *Text Structure BOOM Cards set or pull back individual small groups to re-do some of the “practice” activities found in week 
  3. Finally, we have them take a final assessment.  (Digital or paper/pencil)
I hope this gives you some ideas about how to go about structuring your text structure unit! (see what I did there??) As always, please don't hesitate to contact me if you have further questions or comments regarding this topic or anything in general!

:) Jennifer

Wednesday, July 26, 2023

Cleaning up your DIGITAL classroom!

Although cleaning is not my favorite task, I LOVE the accomplished feeling I get when I really tackle a big project. It may be easier to see if that takes place in an actual physical space, but in today's world, cleaning up your digital life can be just as rewarding! 

Cleaning up and organizing Google Drive for teachers is essential for efficient file management and easy access to resources. I recently spent some time this summer working on this in order to start the year on a fresh page! Here are ten top tips I've gathered to help you achieve this: 

1) Delete Unnecessary Files: Begin by removing any outdated or irrelevant files that you no longer need. This will free up space and reduce clutter. I was surprised at how many things I had saved that I would never use again!

2) Use Google's Search and Filter Options: Google Drive has powerful search and filter options that allow you to quickly locate files. Utilize keywords, file types, or dates to find what you need easily. 

3) Create Folders with a Clear Hierarchy: Establish a folder structure that makes sense for your needs. Consider creating folders for each subject, grade level, or project, and subfolders for specific topics or units. I like to get as specific as possible with this!

4) Use Descriptive Folder Names: Give your folders meaningful names to ensure you can identify their content at a glance. Avoid vague names like "Miscellaneous" or "Random." 

5) Color-Code Folders: Google Drive allows you to assign colors to folders. Use this feature to visually distinguish different subjects or prioritize folders based on importance. This is probably my favorite feature! Just because I love using color in my own life to organize!

6)  Utilize the "Star" and "Priority" Features: Star important files and folders or mark them as "Priority" to access them quickly from the left-hand sidebar. 

7) Keep a "To-Be-Filed" Folder: This is another game changing tip! Sometimes, you may be in a hurry and not able to place a file in its proper folder immediately. Maintain a "To-Be-Filed" folder as a temporary holding place, and make time to sort these files later.  The important thing is to remember to go back!

8) Use Add-ons and Extensions: Explore Google Workspace Marketplace for add-ons and extensions that can help you automate tasks, improve organization, and streamline workflows. I need to do this next! 

9) Collaborate and Share Wisely: Encourage colleagues to organize their Drive effectively and establish shared folders for collaborative projects. Set clear permissions to avoid accidental changes or deletions.

10)  Regular Maintenance: Cleaning up Google Drive should be an ongoing process. Schedule regular clean-up sessions to remove outdated files, archive completed projects, and ensure your folder structure remains organized. 

Bonus Tip: Consider using tools like Google Classroom to manage assignments, class materials, and communication with students. Google Classroom integrates with Google Drive, making file organization more seamless. By following these tips, you can keep your Google Drive clutter-free, well-organized, and optimize your workflow as a teacher.

I'd love to hear from you!  What are your favorite tips when organizing your digital teacher life? Please share!

Happy Teaching!
:) Jen

Wednesday, June 21, 2023

 Have you ever felt like there just isn’t enough time to teach everything that

needs to be covered? When I first began teaching 4th grade Social Studies and

Language Arts, I was definitely overwhelmed with this feeling! I felt like I was

constantly leaving something out and just struggled with how to do a better job

at balancing all of the content. 


It was about that time that my teaching partner 

and I stumbled upon the concept of integration. We were “in between” series in

Language Arts and decided to try teaching all of our standards through the use

of novels. As we carefully selected our first one to try, we were both shocked

at how effortlessly so many language arts standards could be introduced,

reviewed, or practiced in just one chapter of a good, old fashioned novel

written on an upper elementary reading level! 


We decided to take it one step further and choose a book that would also cover 

our social studies standards.  After analyzing several recommended books, we 

decided to go with Frindle by Andrew Clements. This novel clearly had a 

great economics connection and we felt confident that we could engage our 

students through this story in order to help them understand the economic 

standards. Wow! We had no idea how effective this method of teaching 

would be! The kids LOVED reading the story about Nick and his friends 

inventing a new word. They understood concepts like supply and demand, 

entrepreneurship, patents, opportunity costs, needs vs wants, and so many 

others as real life examples literally were right in front of them on the 

pages of this wonderful story! 


In addition, we were also able to introduce our language arts

standards of character traits and actions, perspective and point of view, and

making inferences. To top that off, our grammar and vocabulary lessons were all

based on words pulled from the book to make it more meaningful and connected

for the students. We spent about 5 weeks on that initial integrated unit of study,

and we’ve never looked back! 


Every unit we teach now surrounds a chunk of our

social studies standards and is supported by the language arts skills that we

need to cover. Today, the amount of skills we can cover in 90 minutes

incredible. And, it’s all so connected for the kids! Here is a list of 4th grade

novels and topics we cover and connect through this integrated model of

teaching:


  Frindle by Andrew Clements:  Economics 

  Who was Magellan by Sydelle Kramer:  New World Exploration

  Sign of the Beaver by Elizabeth G Speare:  Native Americans 

  George Washington’s Socks by Elvira Woodruff:  American Revolution 

  Who was Thomas Edison by Margaret Frith:  Inventors 

  The Cabin Faced West by Jean Fritz: Pioneer:  Westward Movement


I can’t recommend this way of teaching enough! It will truly bring the magic and

love of literatures back into your teaching!


Sunday, February 26, 2023

A "SWEET" Test Prep Activity!

Sometimes I think the hardest part of "TEST PREP" season is getting the buy-in from the students. WE know it's important, but to them I'm sure it just feels like more boring review activities. Because of this, I decided to develop a true challenge for them (and I included ice cream!) 

 In a nutshell, my Test Prep Sundae Challenge is designed to foster a sense of competition WITHIN each student to do their very best. At each stage of review, they will be rewarded with a different component for building their ultimate ice cream sundae. I've made the review activities using Google Forms so they can be quickly assessed, easily administered multiple times, and also improve students' on line technology skills. 

 This program is designed to foster a sense of self competition. Thanks to the Google Form platform, students are able to retake the 6 different tests as many times as needed to achieve a desired outcome. The focus is not on comparing their performance to others around them but, rather, to challenge themselves to grow from their own performance attempts. 


Here is how I implement it: 
√  At the beginning of my test prep “season” I send home a parent letter. This will not only inform parents of the nature of the activity linked to test prep, but give parents a chance to feel involved by providing needed materials for the activity. 

 √  I then set my date for the reward sundae party and post it for students to see. I usually leave about 6 weeks leading up to the test to get the most out of this and build anticipation. I'm always amazed by their level of excitement and commitment to meeting this challenge!   

√ I create a schedule that works best for my class each year. Usually following a 6 week period of time; I focus on 1 test per week. I pass out the sundae skill builder chart and go over it with students. This is where they can set individual goals. I then provide the link and time to perform the first task (Literature Test Prep #1) (*all links are provided in a zip file for all 6 tests!) 

√  After all students have taken the first test, I access their responses and share with them. Students fill in their first attempt on their chart. I differentiate my expectations based on student ability. For example, some students need to achieve an 80% on the first try to get the “large bowl”, and other students may need to earn a 70%. It can individualized however it works best for you and your students! 

√  Based on student results, I provide needed intervention the remainder of the week. This can be done in many different ways. I have found the most effective method to be simply printing a copy of the google form assessment and making copies for each student. I project a copy of it on my smart board and we discuss test taking strategies as we go through the test together. If I see a specific skill is really causing some students trouble, I may develop a quick re-teaching mini lesson for that skill. For students who achieved their desired goal on the first try, I assign them free, on-line games to further practice skills at their level.   

√ Re-Assess: Due to the nature of the assessments (Google Forms), students are able to retake the same assessment multiple times. They will fill in their 2nd and/or 3rd attempts scores as needed and mark their desired sundae component. 

√  Set up and enjoy a fun afternoon filled with ice cream and smiles!  Since it is review, I design it so that everyone feels successful based on their level of ability. I hope you might find the value in this highly motivating and engaging test prep activity. 

 I'd love to hear how it works for you or what other ideas you have to engage students during this time of year.  Best of luck to you as you prepare your students!

Sunday, February 19, 2023

Do you have a designated intervention time during your school time? I know that this time can have a lot of different names; such as Catch Up Time, No New Instruction, RTI, Flex time, PLE (personalized learning environment), WIN (what I need), etc. 

 No matter the name, it can be a very important part of your curriculum if used and presented correctly! Here’s the thing, teachers know and understand how valuable this time can be, but many students do not. Instead, they see it as a “free time” or worse, a time when they are tracked by ability. 

Because of this, my team and I have worked hard to create an intervention time that works for everyone and is something students feel successful doing so they look forward to it. Our common time is from 11:50-12:30....every, single day! I know, it’s kind of a strange time, but we can thank the school recess/lunch schedule for that! We made that time a priority for all involved. The only exception is on Friday, when we have our “weekly reward” activity that is built into our behavior management system. 

 Our intervention block includes the 4 core teachers who make up our 4th grade team, our intervention specialist, our gifted teacher, and our reading specialist. During this time, the students know they will be going to different places based on their individual needs. We each post a chart on our Smartboards that we can quickly place our students into the groups that are needed for the day. The students do not go to the same place everyday, so there is no stigma of “being in THAT group” since they are always changing based on need. 

 Here is what happens during an intervention block in my own classroom. 
 1) I have 5 identified gifted students in LA, so on Mon those students meet with the gifted teacher and receive instruction for her. She often gives them tasks that can be completed individually throughout the week and they will spend the rest of their intervention days doing this in the classroom (some meet an additional day for math as well). 
 2) The intervention specialist pulls students that need extra help in various areas based on their IEP goals. This also changes on a daily basis. 
3) The reading specialist will pull a small group for TIER 3 intervention based on our reading assessment. Students who show deficits in phonics and other crucial reading building blocks will be pulled for intensive remediation. Again, this is on a rotating basis daily. 
 4) The remaining students are placed into 2 flexible groups based on any current skill assessments.

Flexible Group 1: Those who didn’t show mastery of a specific topic will travel to one of the core teacher classroom in order to receive an additional lesson/review of this topic. This could be a game, a review packet, etc. 
Flexible Group 2: The students who did show mastery of this skill will work on activities that will extend or review our current skills. I developed a “Bingo Board” that provides the students with a chance to complete an activity of their choice. They will eventually complete all of the activities, but I find the element of “choice” is very helpful to keep kids engaged and feel empowerment in their learning path! 

 I’ve included a picture of what one my Bingo Board looks like below. I actually have 2 levels of my Bingo Boards. For students who need a little more enrichment with their critical thinking skills, I include activities such as logic puzzles, word games, analogies, Brain Pop videos/quizzes, and vocabulary extensions. For students who need a little more review over just basic skills, I include word review matches, spelling city games, Quizlet review for vocabulary, Boom card reviews, etc. Both groups also have options for silent reading and working on their individualized computer pathway that we use (iReady). 


 This program has worked extremely well for our grade! However, it wasn’t that we just got lucky with this intervention time. We really put the time in beforehand to develop a plan that would work for all involved. We all helped to develop the activities and prep the materials that are used on a weekly basis. Because of this, commitment, we feel confident that our students are getting exactly what they need and can say with certainty that our program is a success! 

Here are my 5 “MUST HAVES” when developing a successful intervention time: 
1) Make sure to set a designated time that everyone knows and respects! 
2) Have a plan! 
3) Flexible grouping is key! 
4) Build in activities that students feel successful with to build confidence 
5) Communicate with team members! 

 Please let me know what things you try for your intervention time. We are always willing to implement new ideas and strategies that will help students! Happy Teaching!

:) Jen

Sunday, February 5, 2023


                            CLICK HERE for my FREE Writing Guide!

As an upper elementary Language Arts teacher, I can honestly say that writing instruction is one of the most challenging things to teach! When you think about it, writing truly is the compilation of a ton of supporting skills. Having to develop original ideas to support an opinion while juggling spelling, grammar, vocabulary, and format can get pretty overwhelming to a new writer. 

 I have found that the best practice of “modeling” is essential when it comes to teaching writing. I like to leave a good chuck of time when beginning a modeled writing project because it’s important to leave time for discussion, example sharing, and re-direction. I also really feel that having a strong graphic organizer for students can really help guide them through this entire process in a way that does not appear too overwhelming. 

 My first area of emphasis with the students is always on the prompt. I’ve seen so many students who struggle to stay on the topic when they begin writing. As a result, I like to begin with a little discussion about what specifically is being asked and what all should be included in a response. This is a good time to review the different types of writing as well (persuasive, informative, opinion based, narrative, etc.) 

 After students have a good understanding of what they need to focus on, it’s good to discuss the way in which they are going to grab the reader’s attention from the start. I refer to this as “the hook”. Some examples of good hooks include asking a question, sharing an interesting fact or statistic, using an onomatopoeia (sound word), or sharing a personal statement. I find that by using a topic to model how each of these “hooks” would sound really gives students a good idea of how each can be utilized. I then give time for students to select their own hook and write it down on their graphic organizer. 

 Following this and based on the type of writing being asked to use, we are ready to dive into the actual content that will support their view on the topic. Whether they are being asked to persuade, inform, or entertain, students will be writing sentences that support their topic. In my graphic organizer, I try to have little reminders for what needs to be included such as supporting details, strong vocabulary, and transition words. Again, I feel that modeling this is a crucial step. I will ask students for ideas on how they would introduce the first supporting detail and make sure that it relates back to the topic. I would write these down for students to use as a guide. I then give them time to write their own sentences. 

 When we are coming to the end of their writing, I like to remind them how you never want to leave their reader “hanging”. Instead, this is their chance to re-direct their writing and thoughts back to the topic. I try to give them some options to use such as the phrase “As you can see”, “In conclusion” or “To sum it up”. This seems to help them re-focus their writing back to the prompt. In addition, I have them provide an opinion that helps complete their writing. 

 Again, I feel that it is very beneficial to model this step by step. As writing is a very individual skill, I have found that many students will require this modeled process to be repeated where others can have a little more independence on the writing progresses. 

 This modeled lesson and graphic organizer that I use for the writing process are available by signing up for my weekly email where I love to share additional tips, strategies, and teaching stories! Please join me there! I love to connect with fellow upper elementary teachers!

 CLICK HERE for my FREE Writing Guide!

Tuesday, January 31, 2023

 Hello Teacher Friends!

Teacher evaluations.  I think I have finally figured out why these can cause so much stress and anxiety.  It's not that teachers don't think they're doing a good job for their students or aren't effective in their craft.  Contrary, it's the fact that good teachers DO SO much on a daily basis that it's nearly impossible to capture and show that all in a 30-60 minute snapshot of an evaluation.  Hence, the source of the stress!

Even the pre and post conference can be consumed with specific questions/explanations regarding the observed lesson.  As a result, an evaluator may be left with a very narrow view of what actually makes your classroom run effectively on a day to day basis.

As soon as I was introduced to the OTES 2 teacher evaluation rubric, I knew that I would have to create something to help ease my own anxiousness about being able to show evidence for all areas of the rubric.  I decided to break the rubric down into the 6 main sections:  Focus for Learning, Knowledge of Students, Lesson Delivery, Classroom Environment, Assessment of Students Learning, and Professional Responsibilities.  In doing so, I was able to really pin point the areas that I would need to provide evidence in a written/recorded format; since it was very unlikely or practical to see this through a classroom observation.

I designed each section to include a brainstormed list of ideas and activities that would adequately demonstrate that each standard in every domain was being addressed.  An included checklist further makes sure all standards are being met.  Finally, I gathered the needed resources, charts, materials, and activities that would serve as my evidence.


I am a very organized person so I knew I needed to have a tool that would help me gather and sort all of my data in one convenient place.  I decided to develop a notebook/binder that would help with this.  I created colorful binder pages for each domain and put them in page protectors in a 3 ring notebook.  I then copied the checklists to make sure I had everything needed for each section.  Finally, I just began collecting the information I needed, whether it was administering a Google Form activity for the students, sending home a parent involvement activity, or making sure I was correctly documenting any involvement in school wide professional growth opportunities.


I found this to be an extremely helpful tool during my evaluations!  As my principal would ask me about various things on the rubric, I was quickly able to find any evidence that I had in my binder to provide support as I answered.  This gave me confidence and made me feel very prepared.  (At one point he even joked that he was going to mark me down for having TOO much evidence!)

I made a FREEBIE sample for my evidence binder for other teachers who might find this helpful.  I provided all of the resources, brainstorm pages, checklists, and binder sheets for the very first section of the OTES evaluation:  Focus for Learning.  It includes over 16 pages of ready to print materials!  Please check it out if you think it might benefit you or one of your colleagues! (I have had a lot of new teachers that I've been able to help with this!)

CLICK HERE for my FREEBIE!

*************************************************************************************

If you are not a current subscriber, please consider joining my weekly email list where I share additional tips and strategies, as well as any new resources I've created.  As a bonus, you will receive a FREE Reader's Theater Script of The Boston Tea Party!

CLICK HERE to get a FREE Reader's Theater!


Sunday, September 18, 2022

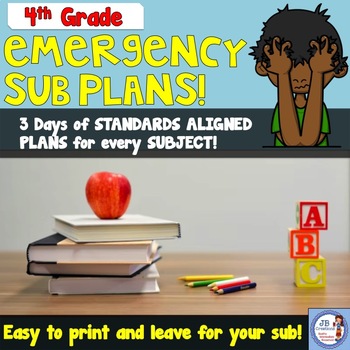
We all know how difficult it is to be out a day for school. I think we’ve all had that inner struggle of determining whether you feel bad enough to call in for a sick day. It’s just so HARD to get ready for a substitute on the fly. Our district actually required us to have 3 day’s worth of plans ready to go this year (we definitely are experiencing a sub shortage in our area). I wanted to make sure the resources that I would leave for my students were flexible enough to fit in at any time or place in the curriculum, but also full of meaningful learning and not just busy work. So I got busy creating! I developed 3 days worth of Language Arts, Math, Social Studies, Science, and Morning work activities (15 activities in all!) that can be tailored to suit individual classroom needs. Complete teacher instructions are included for EVERY ACTIVITY! This makes it easy to pick and choose the subjects/activities you want to leave for any sub you may have. I really wanted to leave activities that were engaging for my kids. Keeping that in mind, I included several class games, a reader’s theater, basic experiments, and puzzles in addition to more typical review activities.


Saturday, September 10, 2022

As the need for more specific literacy based instruction increases in the intermediate classroom, I have really stepped up my game with vocabulary in the past year or so. 

 It has been proven time and again that the larger a child’s vocabulary, the stronger reader they will become. But, how can we make sure our students are learning all of the necessary vocabulary they will need? How can we possibly choose the correct word lists to focus on? The simple answer is....it’s impossible! There are just too many words in the English language. But, there is a powerful tool that you can teach your students to make that seemingly impossible mountain of words easier to attack. And that tool is MORPHOLOGY! 

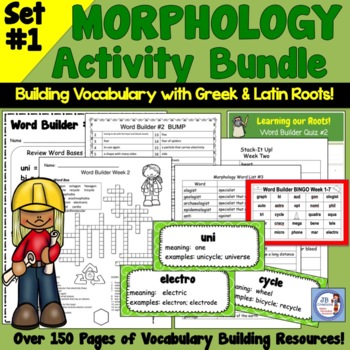
Simply put, morphology is the study of the most common Greek and Latin affixes (sometimes referred to as “root” words) that hold meaning. By having students learn just 1 new root’s meaning, they can later apply that to dozens of words that contain it; giving them a solid advantage when it comes to attempting to learn that new vocabulary word! 

 I have spent the past few years incorporating morphology into my language arts classes and have been OVERWHELMED with the success and speed with which my students have increased their vocabulary. Even more exciting is that what I am teaching them is a LIFELONG skill that will continue to help for years to come! 

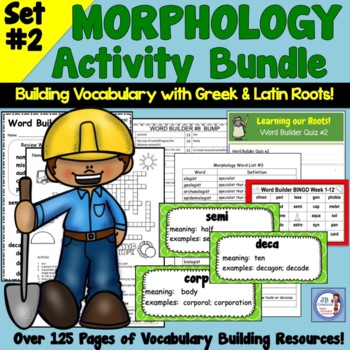
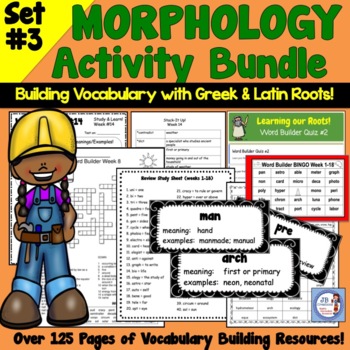
 The program I have developed and designed contains 25 weeks worth of word lists, study sheets, flashcards, individual practice puzzles and activities, weekly Google Form quizzes, whole class review games, and summative assessments for each quarter. Students will learn approximately 35 new roots each 9 weeks and continue to practice previously introduced roots as well. The SPIRAL nature of this program is another one of its very effective features!  By then end of the year, students will have a strong foundation on over 100 of the most common and frequently used roots!

 Here is how I go about implementing my program. It typically only takes about 10-15 minutes per day of my language arts instruction time! 

 MONDAY: I introduce the new roots with my study sheet. We spend time reviewing the 5 “old” roots, and then really talk about the new roots for the week. I have a set of large “word wall” cards (included) that I hang up on the board for the week for them to refer to. We brainstorm together a good definition for the example words after they have learned what each root means. I will pass out a puzzle for homework to be completed by Friday. 
TUESDAY: We cut out the vocabulary flashcards for the week and put them in a baggie after a quick review of the meanings. We play a few rounds of the “I have, Who has” game. 
WEDNESDAY: Students will work on their “stack it up” activity independently. They may use the word cards if they choose. 
THURSDAY: Based on how the students did on their independent activity on Wed, I will flexibly group students to complete 2 different activities. For the kids who need a little more practice, I will pull them back to do a vocab card match with the root cards they cut out. For the kids who have a stronger grasp of the words, I will allow them to play “BUMP” in partners. 
FRIDAY:  I collect their puzzle homework and have them take the Google Form quiz on their chromebooks. This is a quick, self-grading check of their understanding! 

 *At the conclusion of the quarter’s worth of root activities, I spend a week on reviewing all of the roots they have learned in order to give a summative assessment. I have a review sheet, a crossword puzzle, a making words activity, and a Bingo game to help them prepare! I have divided this yearlong program into 4 sections. The first 3 are now available.....with the 4th and final segment slated to be published by the end of October 2022!


Thank you for reading!

Jennifer

Thursday, September 16, 2021

 
Is your upcoming teacher evaluation causing you stress?  Are you worried about switching gears to align your evidence to the updated OTES 2 teacher performance Evaluation?  Does the rubric just seem plain overwhelming?

I have created an updated, comprehensive evidence binder that will make your life easier as you begin to gather, sort, and organize your data!

In addition to the colorful binder covers/dividers highlighting what is needed for each domain, I have also included COUNTLESS activities, resources, Google forms, charts, logs, best strategy highlights, and so much more to make sure EVERY portion of the rubric is accounted for!

I have also provided brainstorming sheets and checklists for each domain that are packed with ideas and links to included resources that will provide you all the evidence you need!

Go show them how accomplished as a teacher you truly are!!


                                                        Click Here for more details!


Thank you for taking time to learn about this!

Happy teaching!  Jen

Tuesday, October 29, 2019

Tuesday Tidbit: Creating groups in a quick, fun way!

I used to be guilty of the famous words, "Find a partner to do this assignment"......and the rest of my direction-giving would be lost; as kids frantically tried to make eye contact across the room with their partner of choice. 

I decided that I wanted this transition time to be a little more productive and fun.  As a result, my "partner match cards" were created!  I developed a set of popular "partner foods" and "partner pairs", a set of famous "trios" and a set of cards designed to form groups of 4.  The concept is very simple...each kid gets a random card passed out to them and they have 1 minute to "find" their partner (or group) in the room.

Check it out below!


Partner Cards!

Tuesday, October 22, 2019

Tuesday Tidbit: How to Make Blueberry Pancakes and See Ohio! Social Studies in Action!


If you are a primary Social Studies teacher who teaches about natural resources, map skills, economics,  or all three (like in 4th grade!),  I beg you to GET THIS BOOK!  How to Make a Cherry Pie and See the USA  by Marjorie Priceman.  
The story begins with a girl who wants to make a cherry pie for the first time but finds that the local cook shop is closed.  Since she will need to make all of the pie making equipment by hand now, she decides to go on adventure across the country to get the materials herself.  The materials include granite from cliffs in Maine to make a pastry slab, cotton from Louisiana to make pot holders, and oil from Texas to make plastic spoons, just to name a few.  I loved this book and its Social Studies connections SO MUCH that I decided  to develop my own project for my students to work on based on the natural resources found in Ohio.  They LOVED it!  I actually couldn’t believe how much the students enjoyed this activity.  And I loved that it covered so many standards in such a fun, engaging, and meaningful way!  I even created a Google slide template and shared it with my students so that they could attach pictures and publish their adventure!  This has definitely been one of the my top lessons this year and I would love to share it with you!  As a thank you for visiting my blog and taking the time to read my post on this activity, I’ve included it for free below.  I’d love to hear how it goes in your classroom if you try it!